Showing posts with label sandpit theory. Show all posts

Saturday, February 4, 2012

Does the Turin Shroud carry a designer label – showing how it was made (immediate contact with a HOT body)?

I have been comparing the results of my “sandpit” modelling of the Turin Shroud (see two previous posts) with a magnified image from the Shroud fabric.

Here they are, one above the other:


 "Modelling" of Shroud image by thermal imprinting off a metallic 3D object


 Close up of image-region on Turin Shroud

Here is the text from the original article  (my italics)

"Close up view of the Shroud cloth. Each thread is hand spun from cellulose fibers from flax. Notice golden color on some of the fibers. Spectral and chemical tests show that fibers are coated with a thin carbohydrate file. In places this film has turned a golden-brown color that seems to be the result of caramelization or a Maillard reaction.
The coating is superficial. It is only found on the outermost fibers at the crown of the threads. Pulling back individual fibers reveals that there is no image color below the outer threads."


Notice any resemblance?

Observe how the thermal footprint on my linen sheet accentuates the weave pattern on the linen. 


 Note selective scorching of  the more superficial "crown" loops, especially in less-strongly printed areas.

Then look at the Shroud image, and read the account that accompanied it. Am I not correct in thinking that we are looking at the same highly superficial, selective scorch phenomenon – that it is only the most exposed part of the thread – the so-called “crowns” - where weft loops over warp, or warp loops over weft, that is scorched.

 Know your jargon - warp versus weft

Here is a diagram off a Google image file that I have touched up with MS Paint to show those "crowns" that are most exposed and vulnerable to scorching by CONTACT/CONDUCTION. (Ignore the knots)

Parts of the same fibre, immediately adjacent, separated by a fraction of a millimetre, escape scorching.

What is that if not a signature in both cases of scorching by IMMEDIATE CONTACT, requiring CONDUCTED heat from the hot body. Radiant heat from the same body-   at least below red heat -  is not sufficiently intense to  scorch, the latter requiring direct and intimate contact. Is the pattern I describe not a "designer label" in a manner of speaking - and I mean a human, not celestial designer-  applying mundane earthly physics and technology... ?

Strangely there is a paucity of images available from the internet on magnified close-ups of the Shroud, but there seems no reason to doubt that the Shroud image bears a close resemblance to the one in my experiment, showing highly localised crown-scorching, with negligible scorching deeper into the weave. 

This would appear to me (and earlier Ray Rogers  ) to virtually exclude any mechanism for image-production that depends on radiant energy, regardless of the region of electromagnetic spectrum used – microwave, infrared, visible, ultraviolet, x-ray or gamma ray. 

Paolo di Lazzaro and ENEA colleagues please note. Put your uv excimer lasers away – or at any rate use them for the originally-intended project. Some might think you are doing for Italian science what your countryman Captain Schettino did for Mediterarranean cruises, going way off course, and ending up grounded on rocks.


Those highly superficial scorch marks, corresponding with those weft and warp crowns,  ones which others maintain as challenging the very foundation of  modern science - simply indicate highly intimate ("tactile") contact with the fabric.

But how can a hot human body, alive or dead, scorch linen without scorching itself?  It cannot, obviously, unless one engages in fantasies about spontaneous combustion (which would have set the Shroud alight).

It seems self-evident that Shroud image was made by close and intimate contact with a hot inanimate body. As before, I suggest that it was a bronze(?) statue of the crucified Christ, or possibly customised bas reliefs – one for the front, one for the rear, possible even separate ones for face, arms etc.

There’s more I could say on the details, implications, directions for future research with crucial tests of rival theories – but I shall stop here for now and invite comments.  Comments are the lifeblood of blogs.  Oh, and may I remind some folk that science buzz  is a blogsite, with no ambitions or pretensions at being a dry and/or turgid scientific account, albeit with the loss of some "authority" - a drip, drip sometimes working as well  - and more gently - in the long term than a sledgehammer. This blog exists to highlight GOOD science, and to expose BAD science... (regardless of religious side-issues).

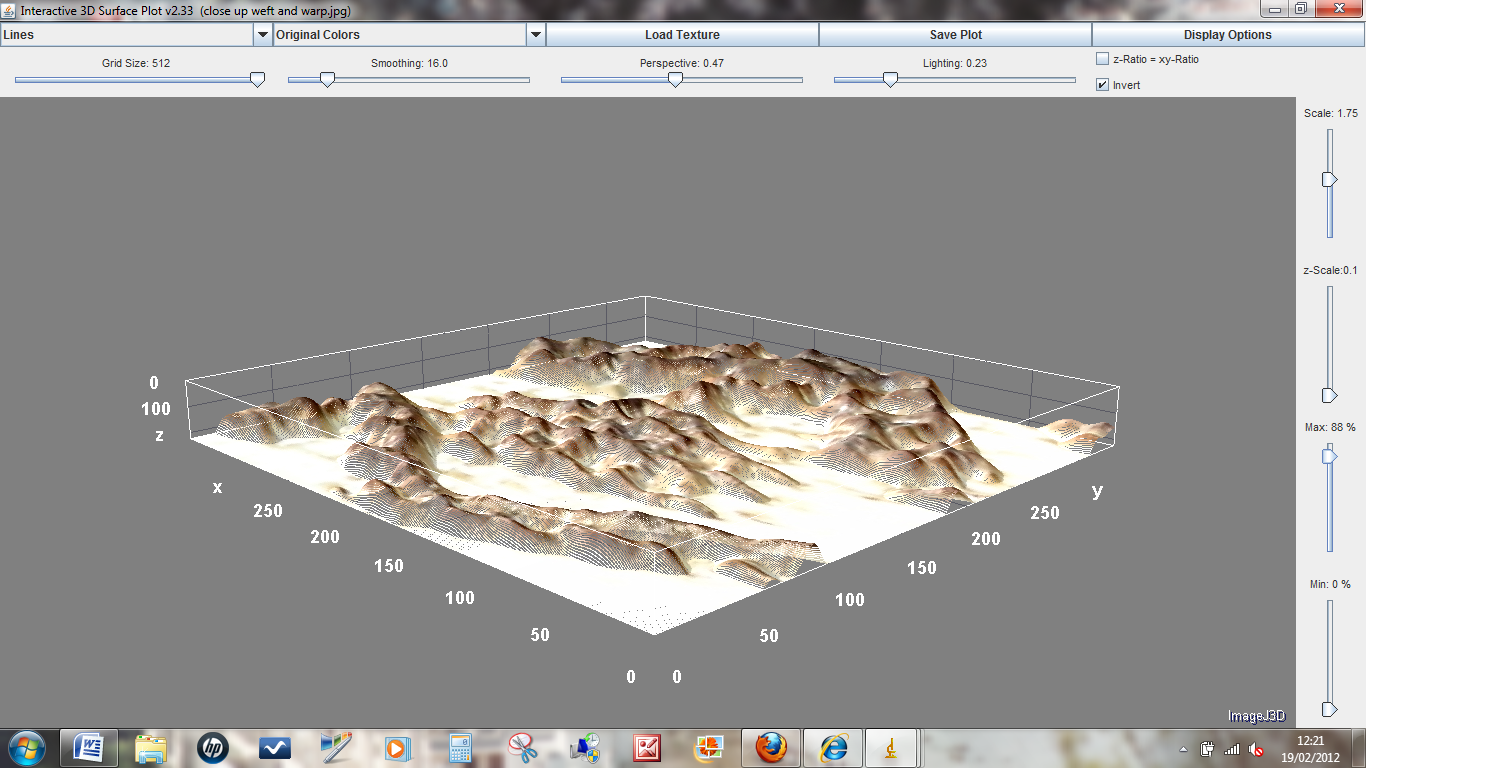
Postscript added Feb 20: I thought it would be interesting to put the scorched weave photograph into a 3D imaging program. Here's the result:


Before turning up the relief gain control:


And after ...

Moral: there is no "science" here. All you see is the result of the (clever) software performing a mathematical transformation. Remember that next time you are presented with the 3D rendering of of the Shroud image, rather than the original "negative" with those staring eyes and that curiously flat facial image that ends abruptly at the cheekbones left and right, with front and rear aspects of a supposedly crucified body but no sides etc etc...

Thursday, February 2, 2012

A step-by-step guide to faking the Turin Shroud (on a miniature scale - but it's the principle that matters)


Here's what I used to start with - a 3D artefact (Ghanaian trinket), a bed of moist sand, a pair of pliars . Didn't need the spatula... Note the result of the previous experiment (linen stretched over heated face-up trinket, instead of face-down towards linen/ sand)


I then placed a square of linen over the sand tray, and pushed the trinket face down into the linen/sand


Here you can see the indentation left in the linen/sand when the trinket is removed in preparation for heating. The indentation is a guide to where to place the heated trinket into a pre-prepared cavity (but I might try using level sand next time).


Here is then trinket being heated. A sample of linen is used to test its temperature (note that it has charred at the end, meaning the trinket is now hot enough to scorch linen, probably overheated in fact (but in this pilot trial I deliberately set out to produce a 'extreme' end-result that would photograph well)


Here is the hot trinket being pressed down into the linen/sand. At this stage there is no evidence of scorching.


Here is the trinket being removed. It stuck half way - on account of charring at the nose...


 First view of full thermal 'footprint' (correction - 'faceprint')


Trinket fully removed, revealing a thermal print of most of its features compared with original.  Note the way that the cheeks show up - that did not happen without the sand , i.e. when the linen was pressed down on the trinket face-up. Note the amount of fine detail picked up - the beading on the eyebrows etc. Note too that the image is left-right reversed (like a photographic negative), see the blemish on cheek as a marker.


 Here was a second run, using a less-strongly heated trinket. There are two scarcely visible scorch images - side by side - to the left of the trinket. Granted this photograph  is lacking in  visual impact, but is a better model for the faint image on the Shroud. With trial-and-error it might be possible to reproduce the precise image intensity of the Shroud of Turin.


Postcript: I see elsewhere that my idea has been criticized on the grounds that it contravenes the Universal Fluoresence Principle  ;-)  The latter in case you are not aware, dear reader, is based on the observation that while the 1532 burn marks on the Shroud fluoresce under uv light, the Shroud image does not. Ipso facto, the Shroud image cannot represent a scorch mark.

Strange, don't you  think that one tiny observation should be held to constitute a veto on any idea that the Shroud image is a scorch mark? Now had the original observation been backed up by generating scorch marks by a variety of means, and showing that all, without exception, fail to fluoresce under uv, I might have had greater respect for the idea that the Shroud image could not be a scorch.

Maybe it's the result of having had a strong grounding in organic chemistry as part of my first degree (in Biochemistry) backed up by subsequent research experience - most of it postdoctoral - that I am hugely unimpressed by that single obeservation re the 1532 scorch mark. 

What causes certain molecules to fluoresce under uv light? It is usually due to the presence of a number of  C=C double bonds in the structure, in linear and/or cyclic regions of the structure. When these chromophores absorb a quantum of uv light, there is often a number of ways that the energy can be subsequently released when promoted electrons drop back between quantised energy states, and in a conjugated diene system it is sometimes the case that the energy difference corresponds to the frequency of light in the visible part of the em spectrum.

So what might encourage the formation of fluorescent chromophores ('fluorochromes') in a fabric that is primarily cellulosic?  Answer: pyrolysis, i.e. heating in the absence of oxygen, because the chemical dehydration reactions (elimination of the elements of water, i.e. hydrogen and oxygen atoms in a 2:1 ratio) produce double bonds in the absence of oxygen.  But pyrolysis is almost certainly the appropriate description for what happened to the Shroud in the 1532 Chambery fire, where the Shroud was at least partially protected inside a silver reliquary that was engulfed in a fierce fire: the Shroud would have been heated  in the presence of limited oxygen, so double bonds and fluorescent properties were highly probable.

In short, one cannot use the Chambery fire as a basis on which to propose that ALL heating and charring results in fluorescence, least of all that the Shroud image is NOT a scorch. The latter could have been formed in the presence of ample oxygen.

It's time the "Universal Fluorescence Principle" was laid to rest, or alternatively put to a more rigorous chemical test. 
I might even try doing it myself sometime, given that ultraviolet lamps are not difficult to come by...

Second postscript: Here's a quickie experiment that makes two points: firstly that top-printed images (upper row)  are lacking detail compared with those made with a sand bed (lower row), and secondly that any degree of image intensity can be obtained by using a progressively cooler artefact (left to right):


Click to enlarge


Third and final postscript:

How many times recently have you come across this bit of pseudo-scientific twaddle in the Shroud literature?:


"The Shroud image is "extremely thin, one-fifth of a thousandth of a millimeter ... corresponding to the thickness of the primary cell wall of a single linen fiber" . Clearly no medieval or earlier forger could make even a single mark on linen that thin, let alone create the image of a man, front and back, on a linen sheet, of that extreme thinness."


Portion of an illuminated manuscript


 Er, one fifth of a thousandth of a millimetre is 200nm. Has the writer never heard of medieval illuminated manuscripts? Does he not know how the gold was applied?  Answer: as gold leaf, usually on the tip of a brush. The typical thickness of gold leaf?  Yup: 200nm   ;-)

The method I describe here does not of course require applying any pigments or other chemicals.  One uses conducted heat to alter the surface layer of carbohydrate molecules, which may be cellulose, or, in the view of Raymond Rogers, some kind of starch or simple carbohydrate coating. 
The effect of heat is to produce chemical dehydration, i.e. elimination of the elements of water, introducing double bonds into the carbohydrate(s) that cause the scorched linen to absorb appreciably more light at the shorter wavelength (blue) end of the visible spectrum. The scattered blue-deficient light, primarily red and green, is then perceived by the human eye as yellow or pale brown.

Comments invited...


How was the Turin Shroud faked? First experimental test of my sandpit theory

They say one picture is worth a thousand words. Well, here are just two  pictures for starters showing an extreme scorch image produced by my sandpit theory (see previous post).


 Heat 3D metal object. Use a fragment of linen to test temperature (deliberately made high for this experiment to produce an 'extreme' example of a thermal footprint).


Press the heated artefact into linen spread over a tray of moist sand. Then remove the object to reveal the thermal footprint. Shown here half-removed (excessive charring under the nose made it stick at that point).
That's the bed of sand you see intruding on the right. The sand makes all the difference when thermo-printing off a 3D object.


Conclusion:  my 'sandpit theory' for how the Turin Shroud was produced  has been confirmed to work - at least in principle. Details can come later (as will a fuller series of photographs taken during the above experiment).

For the moment, I'd simply say that one can obtain much fainter, more superficial images, comparable to the one on the Shroud of Turin, by heating to a lower temperature, and applying less pressure when impressing the 3D object into the linen/sand.

Equipment required: A 3D object made of metal (I used a trinket bought off a street-trader in Ghana), a source of heat (e.g. an electric ring on a cooker),  a shallow tray filled with moist sand, a square of linen (I used a portion off a decorator's floor sheet), and a pair of pliars with which to grip the hot object.

Discussion: I suppose one could call the image a 'thermal footprint' (or maybe that should be 'faceprint' in this instance). 

Will it be shown to have 'encoded 3D information' if scanned, digitized and displayed on a VP-8 image analyser?  Probably yes, is my guess, depending on what one means by "encoded" and "3D"

I personally see no reason why the 'thermal footprint' above cannot be rendered in 3D, in the same way that a photograph of a boot print with a ribbed sole in mud could be made to resemble a forensic scientist's 3D plaster cast of the same after computerized image manipulation. There's nowt mysterious about converting 2D images to 3D representations, just as long as one realizes one is dealing all the time with artefacts, at least if the initial object (boot, metal trinket, bronze statue even of the crucified Christ)  is an artefact.

Tuesday, January 31, 2012

My new sandpit theory for how the Turin Shroud was produced - as a medieval hoax


 The basic principle - thermal imprinting  from a 3D object

(ed: things have moved on a bit since writing this post. For a more up-to-date account of my theory, see this later post, link  and the one preceding it link)


ed: a lot of the step-by-step photographs have mysteriously disappeared from this post. I will endeavour to restore them ASAP.
The technique is essentially one of 'branding' (yup, as onto the hide of cattle) but the 'branding iron' was more probably a bronze statue - which did not need to be red hot to create a superficial scorch on linen.

This is intended as the briefest of summaries. I propose using my own comments section to flesh out the details, but only in response to queries. In the absence of comments my time is probably better spent in  further experimentation  (continuing the work I have described in previous posts on thermo-imprinting or thermo-stencilling). 


Essence of the new model:

1. It uses a statue or bas relief of a crucified Christ - the kind of icon that would have adorned (if that is the correct term) many a medieval church or cathedral.

2. A shallow sandpit (US: sandbox)  is made with fine dry (ed. or maybe moist?) sand and levelled off with a rake.

3. The sheet of linen is stretched over the top of the sand and smoothed out. The linen may have been impregnated to make it more receptive to acquiring a heat-imprinted image (think "invisible writing" that uses dried-on  lemon juice or similar).

4. The statue is evenly heated in a kiln or oven until a test shows it to be hot enough to make a yellow or brown impression, i.e. 'scorch mark',  on a side-sample of the linen.

(Whether one calls it a scorch or not is a matter of semantics that can be discussed later. Certainly it does not have to be hot enough to degrade or scorch bulk cellulose per se, except perhaps for a highly superficial imprint).

5. The heated statue is then placed face-down horizontally onto the linen, and pressed down lightly.

 Except for awkward bits like the feet (see later) the statue is probably pressed no more than a cm or two into the sand, just sufficient to imprint as a light scorch the most prominent frontal features of the statue onto the linen, with little of the side features that might otherwise later give distortion when the cloth is removed and flattened.

The image would of course be a "negative", but that has nothing to do with photography, primitive of otherwise. The technology here is better described as thermal-imprinting by direct contact, relying mainly on heat conduction rather than radiant energy..

6.  When a satisfactory image has formed of the ventral (frontal) side, the second unused half of the sheet is positioned over the newly raked sandpit, and the process repeated for the dorsal (rear) side of the statue.

7. What about the blood stains - getting them correctly positioned etc? That can be arranged by a slight modification of the procedure.


It requires a "dry run", or more correctly a "cold run". Firstly, the cold, unheated statue is pressed onto the cloth  so as to penetrate the sand a little, leaving an indentation in both the sand and the linen. The statue is then carefully removed, and blood is then applied to the appropriate parts of the anatomy, as judged from the indentation.  It may be left to clot and dry first. The statue is then taken away and heated, and then deposited carefully back into its original indentation to ensure consistent alignment, then pressed down a little more into the sand in order to get a good impression.

8. Created in this way, I believe the image would meet some subtle criteria that so far have not been fully achieved, e.g. in Jackson's work with his bas-relief models (see earlier post).

I believe a balance can be struck that can achieve a good compromise between a shallow bas-relief and a fully 3D statue.The compromise gives enough relief to account for 20th century "3D-encoded information" - which if the truth be told is really just an (over-hyped) analogue- to-digitized impression of 3D, ie differential scorching- to-computer-aided graduated relief.  The dynamics of the pushing process, ie. - the gentle pressure on the statue, impressing it into the fabric and into the receptive cushioning sand to achieve progressively greater contact between cloth and hot metal is what helps to achieve a softer-focus more natural effect.

9. Because the statue is pressed downwards into the sand, i.e. at right angles, that would account for the so-called "directionality" of the image-forming process.

Attempting to explain the latter with radiation and projected images has been problematical, in the absence of lenses, concave mirrors, collimating systems etc., none of which are credibly medieval or indeed achievable today

10. This procedure might also explain some of the curious - or at any rate unexpected - features of the Shroud, e.g. the somewhat elongated fingers.

  Those fingers  (to say nothing of those "too good to be true" blood trails on forearms and that celebrated  "mechanically-correct" nail wound through "wrist").

That could be the result of a "sliding effect" of those hot fingers (one of the the first parts of the statue to hit the fabric) during the first few moments of pressing into the sand. It might also explain why the soles of the feet are so prominent on the dorsal image, despite their being out-of-horizontal plane, since the sand-moulding influence forcing fabric against metal would be largely indifferent to plane.


Why are the soles of the feet (even if blood-stained) so prominent in the left hand image (dorsal view), with subject's back to linen? What had been holding the linen so close and tightly apposed to them at the instant of image-imprinting? A bed of supportive sand, banked up maybe?

 To get a better idea of how soles come to be imprinted, and how they look on the flattened sheet, imagine yourself lying down on a sheet with muddy boots, first with heel-only contact, then imagine you ask someone to raise and then press the end of the sheet against the muddy soles to leave an imprint. Then imagine how the imprint will look when you get up and view the flattened-out sheet from above.


Comments - premoderated - are invited, but ad hom attacks will not be tolerated (or published)   If posting as "anonymous" please append an initial or two.